The process described for leading edge panning has also been observed downstream of butt welds.
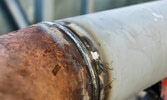
Butt welds in field fabricated spools can be misaligned so that there is a down-step in the internal bore going downstream of the butt weld. If one or both pieces of pipe are oval, then there is likely 2 to 4 places on the circumference that will experience a down step in the bore when they are rotated to the 6:00 position.
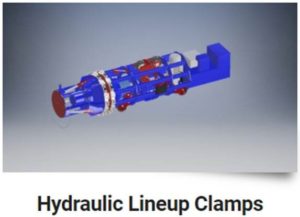
Heavy duty internal bore alignment clamps are available that are strong enough correct oval pipe and match up the IDs well. These fixtures are rarely specified for oilsands slurry piping systems.
Experience has determined that butt weld panning will often reduce pipe wall thickness by 2mm. This is considerably less than what has been measured at a Leading Edge. This is probably because the size of the step at the LE can be much more than for a butt weld.
In order to reduce risk of eating into the minimum thickness required for pressure rating or even holeout, the target minimum thickness at the end of a rotation or end of life must be increased by 2mm.
If there was no butt weld bore alignment issues the target EOL could be 5mm instead of 7mm (on originally 18mm wall thickness) representing an increase in service life of 18%. If you are replacing $50M of piping a year this would represent a saving of $9M a year to be able to safely push the EOL thickness down to 5mm.
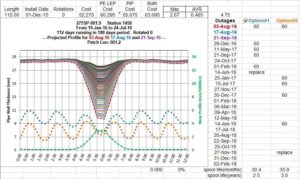
This PIPVIEW report shows that the predicted spool life increases by 35.9 / 30.4 = 18% if the EOL target is changed from 9mm to 7mm.

There have been attempts to detect butt weld panning using manual UT surveys. This could be a very expensive procedure because every butt weld would need to be measured at the current 6:00 position about 2/3 of the life through the present rotation. The measurement requires manually searching for a minimum thickness downstream of each butt weld and comparing that thickness to the thickness upstream or downstream about 50cm. From a practical perspective, you have not eliminated the risk if you cannot access 100% of the butt welds at the 6:00 position during every rotation. (On 30km of slurry pipe there are about 2,500 butt welds.)
The most common butt weld that is not aligned well is the first butt weld down from the leading edge because that is the piece of pipe that is cut to length to make the spool fit in location.
The PIP360 24 sensor ring array instrument has additional spot sensor channels so that a 6:00 sensor at the Leading Edge and a 6:00 sensor downstream of the first butt weld can be included. If the wear rate increases compared to the 6:00 wear rate measured by the 24 sensor ring about 1m to 2m downstream of the Leading Edge, then an alert flag is set in the PIPVIEW reports.
The best solution for butt weld panning is an engineering solution that eliminates the problem.


